Complete Tutorial Guide
A step-by-step walkthrough of every feature in the Cataloging Assistant
1. Getting Started
Accessing the App
Open your web browser and navigate to assistant.cataloguer.name. The app works best in modern browsers (Chrome, Firefox, Safari, Edge).
First Visit
When you open the app for the first time, you'll see a welcome dialog:
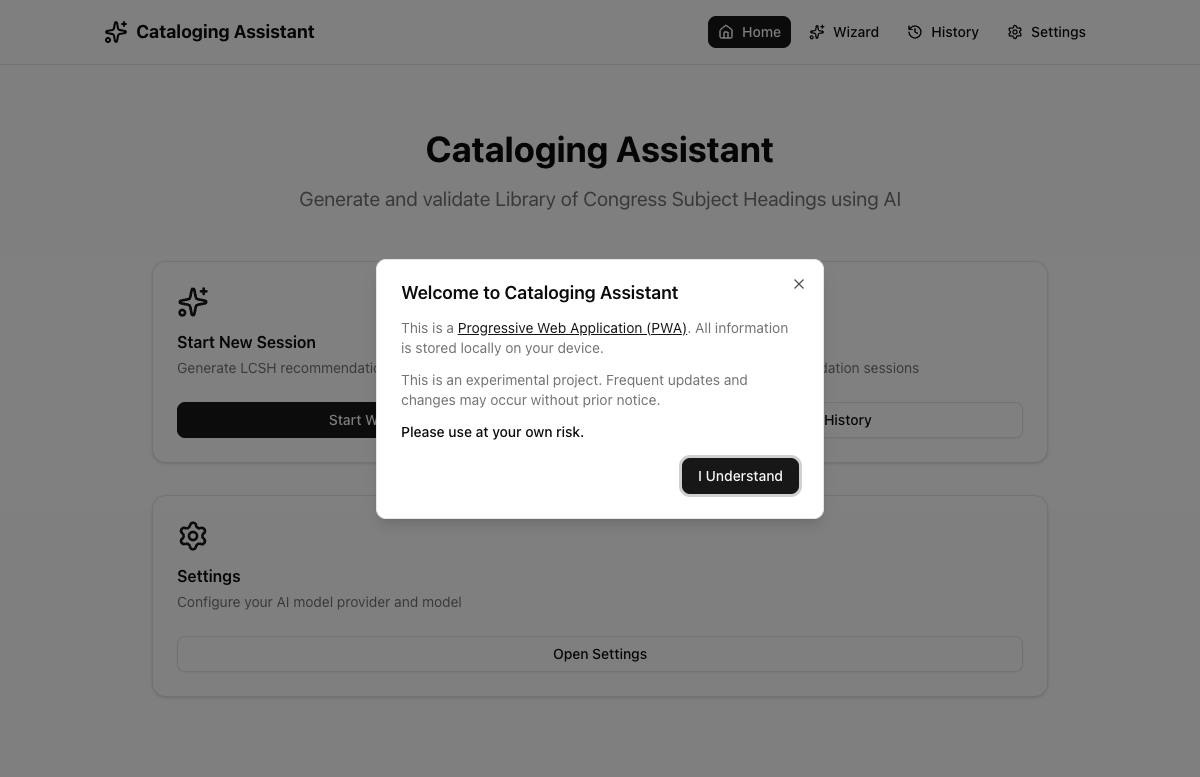
This dialog tells you three important things:
- This is a PWA — All information is stored locally on your device
- It's experimental — Frequent updates and changes may occur without notice
- Use at your own risk — Always verify AI-generated headings against professional standards
Click "I Understand" to dismiss the dialog.
Home Page
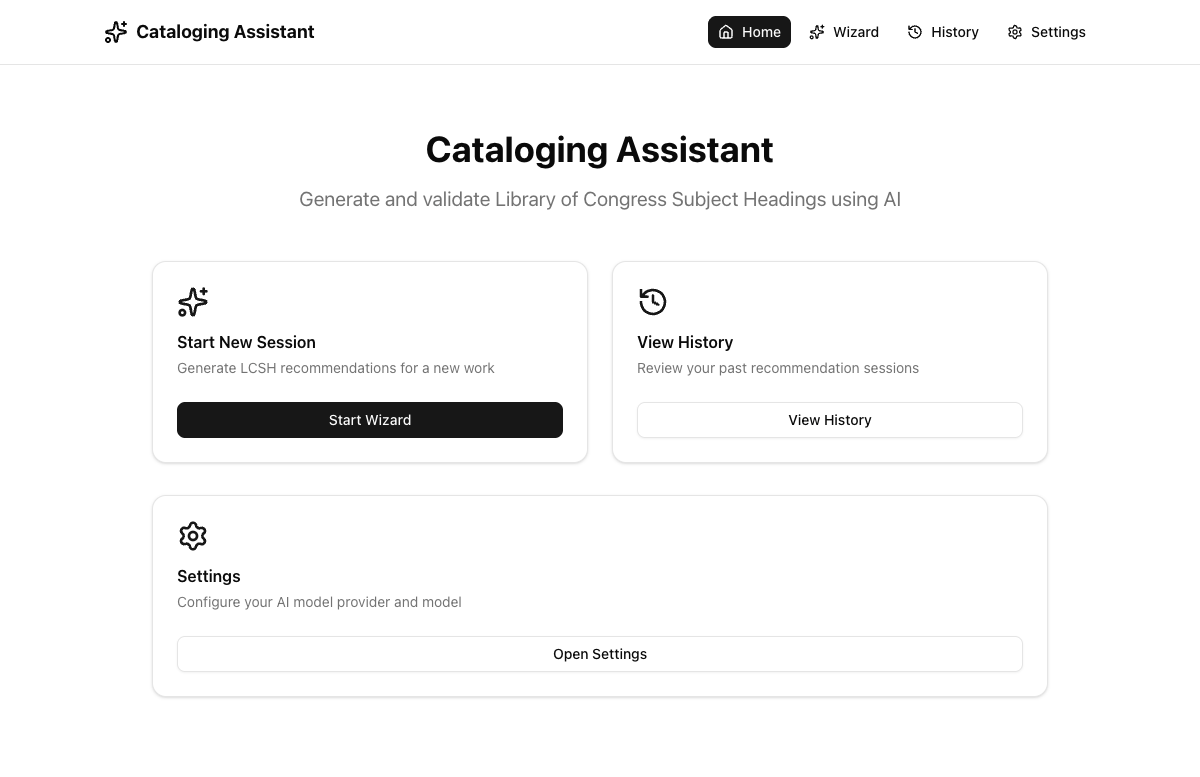
After dismissing the welcome dialog, you'll see the home page with three action cards:
| Card | Description |
|---|---|
| Start New Session | Generate LCSH recommendations — opens the 3-step Wizard |
| View History | Review your past recommendation sessions |
| Settings | Configure your AI model provider and model |
Installing the App (PWA)
The Cataloging Assistant is a Progressive Web App, which means you can install it on your device and use it like a native app — with its own window, icon, and faster loading.
- Visit the app URL in Chrome or Edge
- Look for the install icon in the address bar, or click the three-dot menu and select "Install Cataloging Assistant"
- Click "Install" in the confirmation prompt
- The app opens in its own window and appears in your app launcher
- Visit the app URL in Safari
- From the menu bar, click File > Add to Dock
- Confirm the name and click "Add"
- Open the URL in Safari (does not work in Chrome on iOS)
- Tap the Share button (square with upward arrow)
- Scroll down and tap "Add to Home Screen"
- Edit the name if desired, then tap "Add"
- Open the URL in Chrome
- Tap the three-dot menu
- Tap "Add to Home screen" or "Install app"
- Tap "Install"
2. Configuring Settings
Before you can use the Wizard, you must configure an AI model provider. Navigate to Settings by clicking "Open Settings" on the home page or "Settings" in the navigation bar.
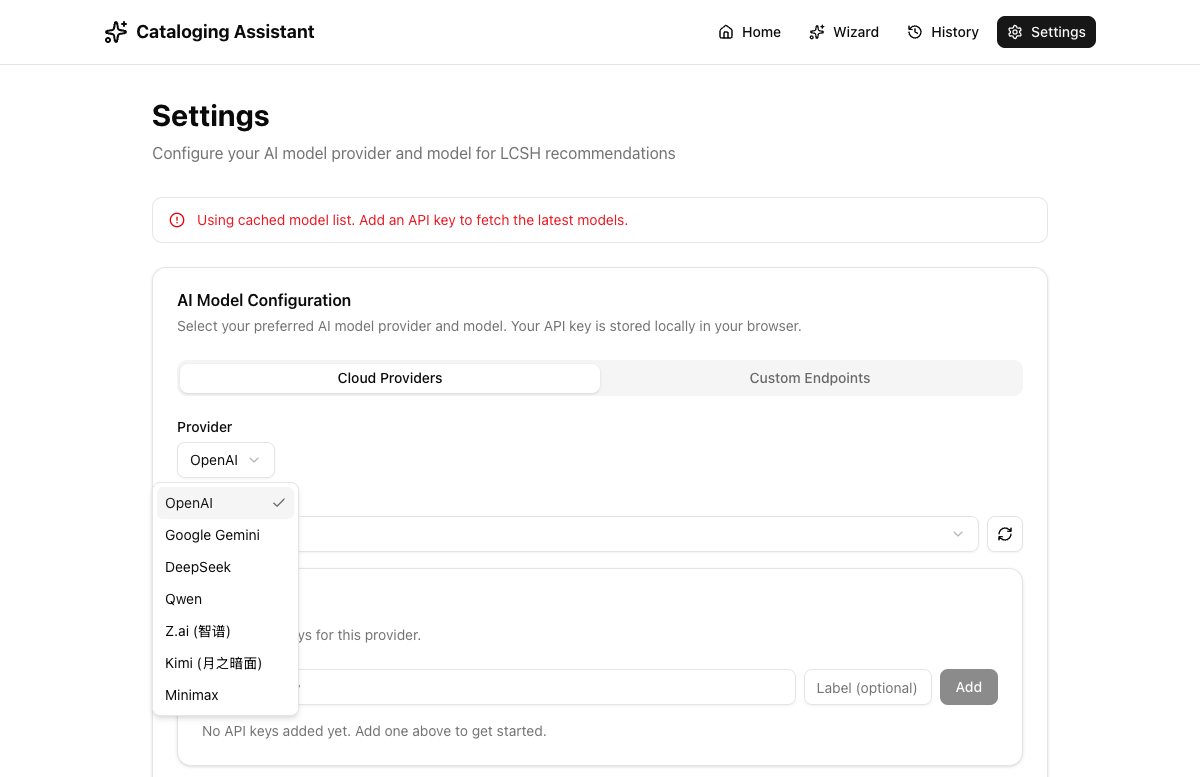
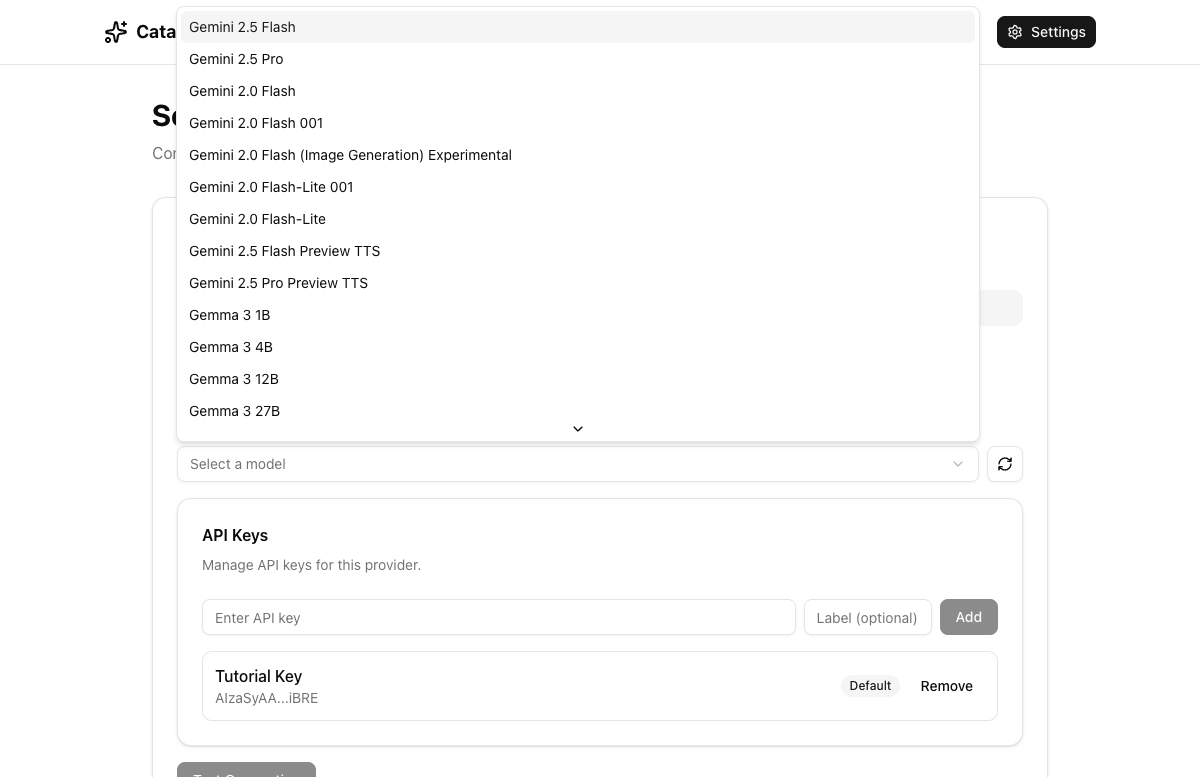
Selecting a Provider
Click the "Provider" dropdown to see available cloud AI providers:
Adding Your API Key
After selecting a provider:
- Enter your API key in the "Enter API key" field
- Optionally give it a label (e.g., "Tutorial Key", "Work Key")
- Click "Add" to save the key
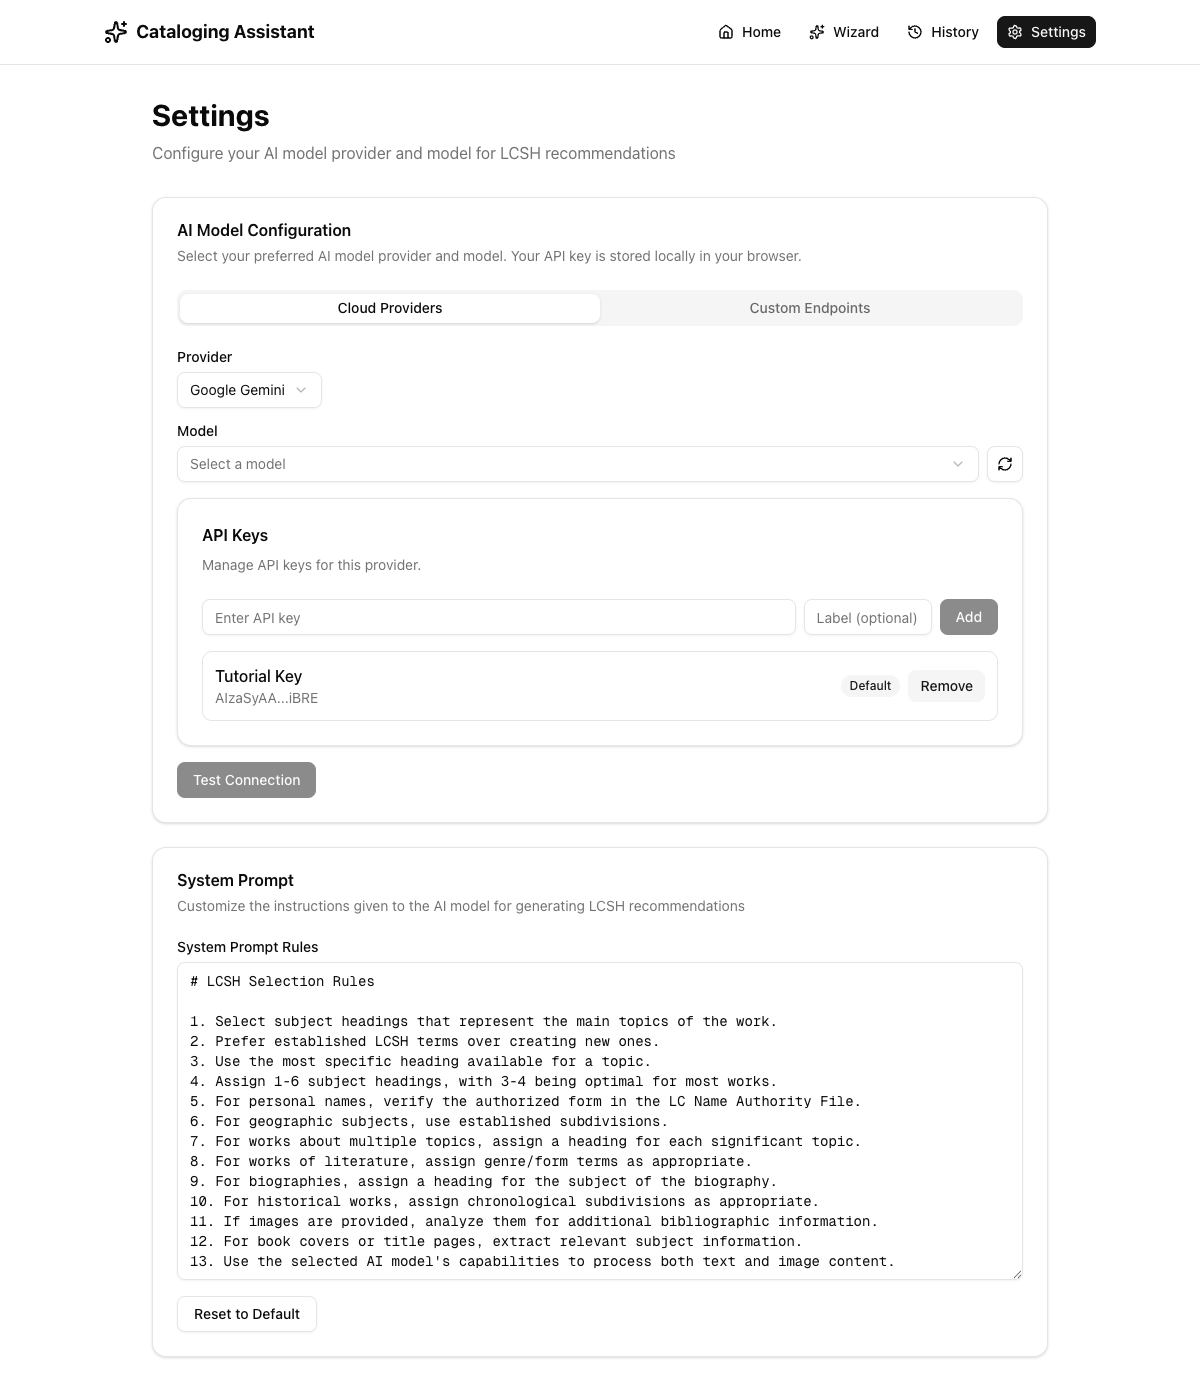
Selecting a Model
With a provider and API key configured, select the specific AI model:
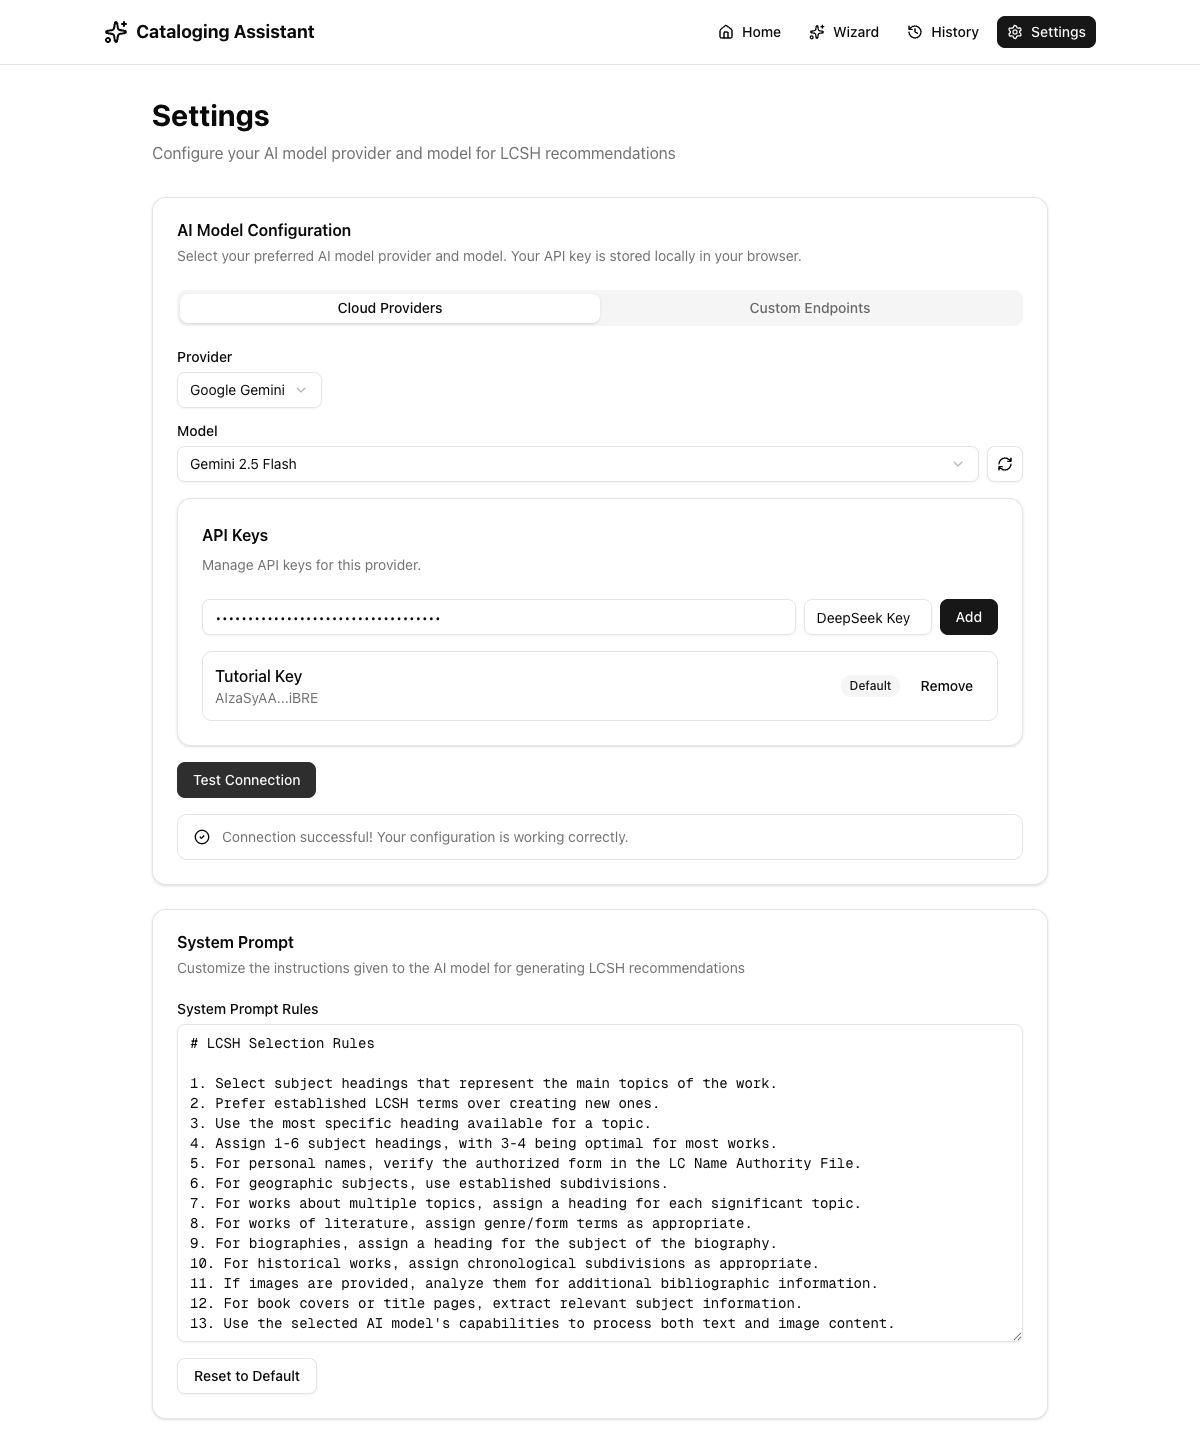
After selecting a model, your configuration is complete:
Testing the Connection
Click "Test Connection" to verify your configuration.
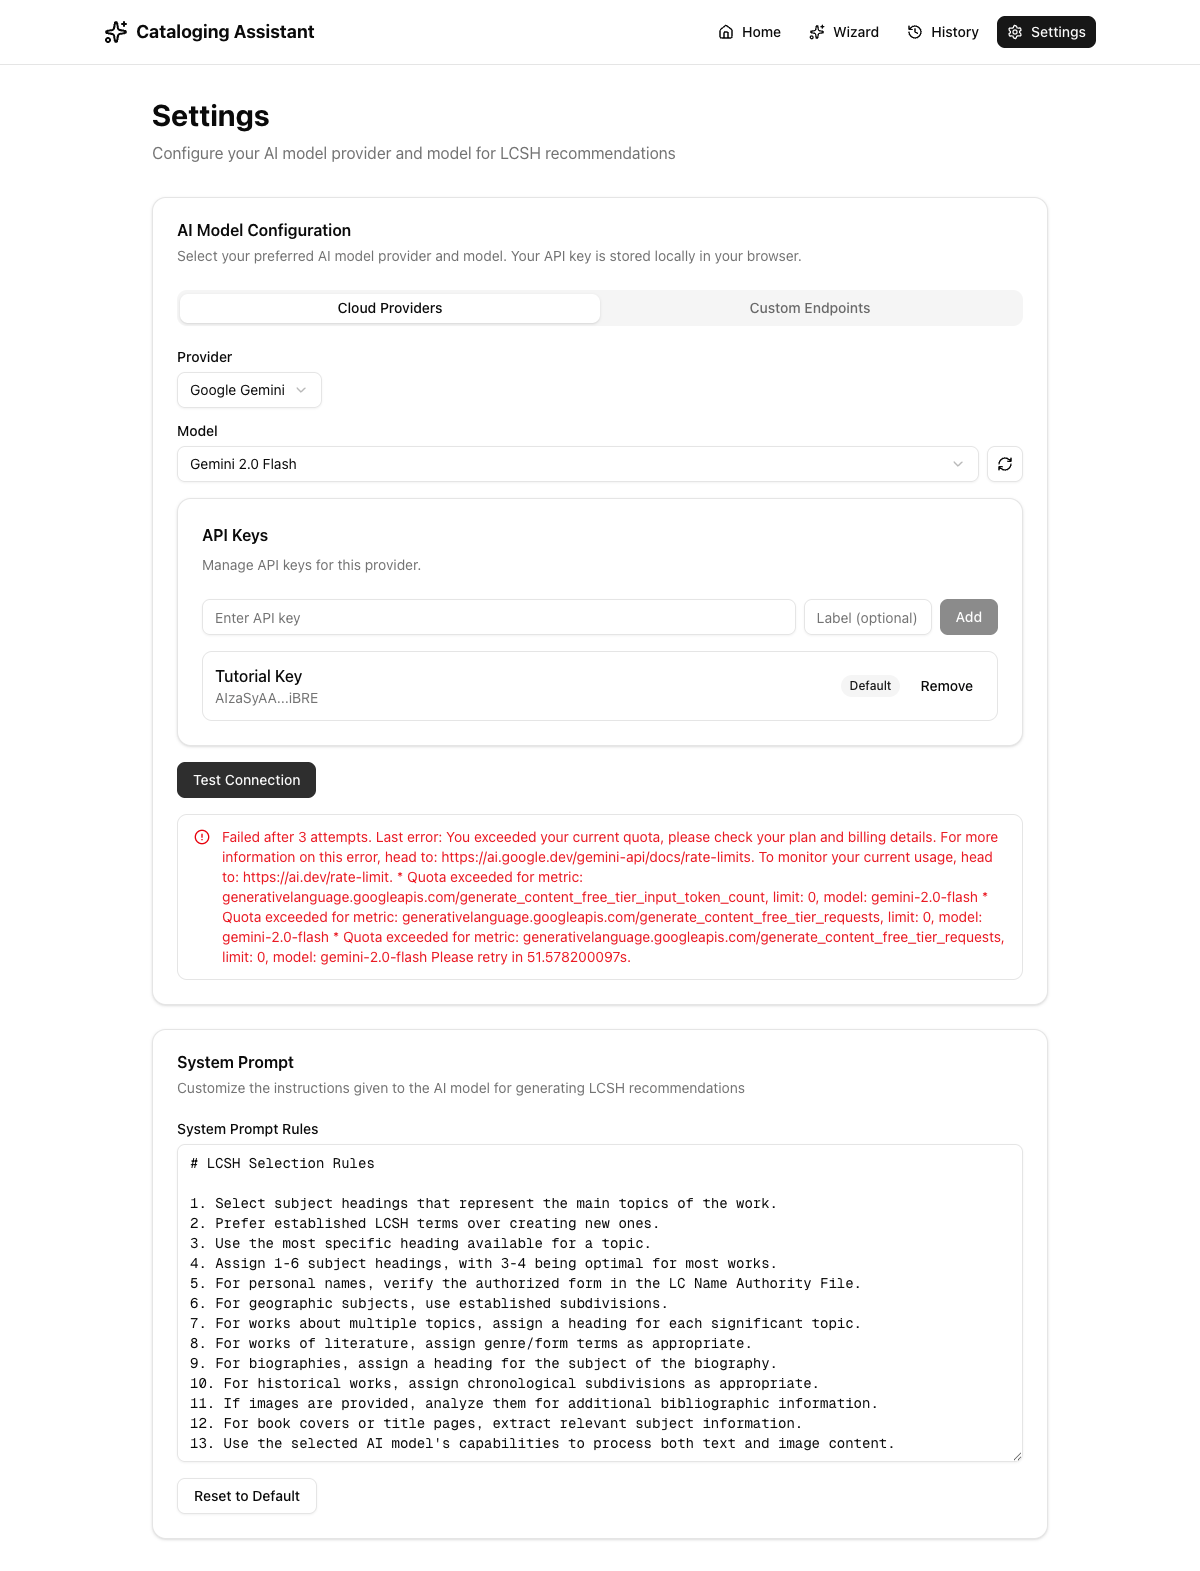
Common errors: 401 (invalid API key), 429 (quota exceeded), Model not found.
Custom Endpoints
If you're running a self-hosted model or using an OpenAI-compatible API, switch to the "Custom Endpoints" tab:
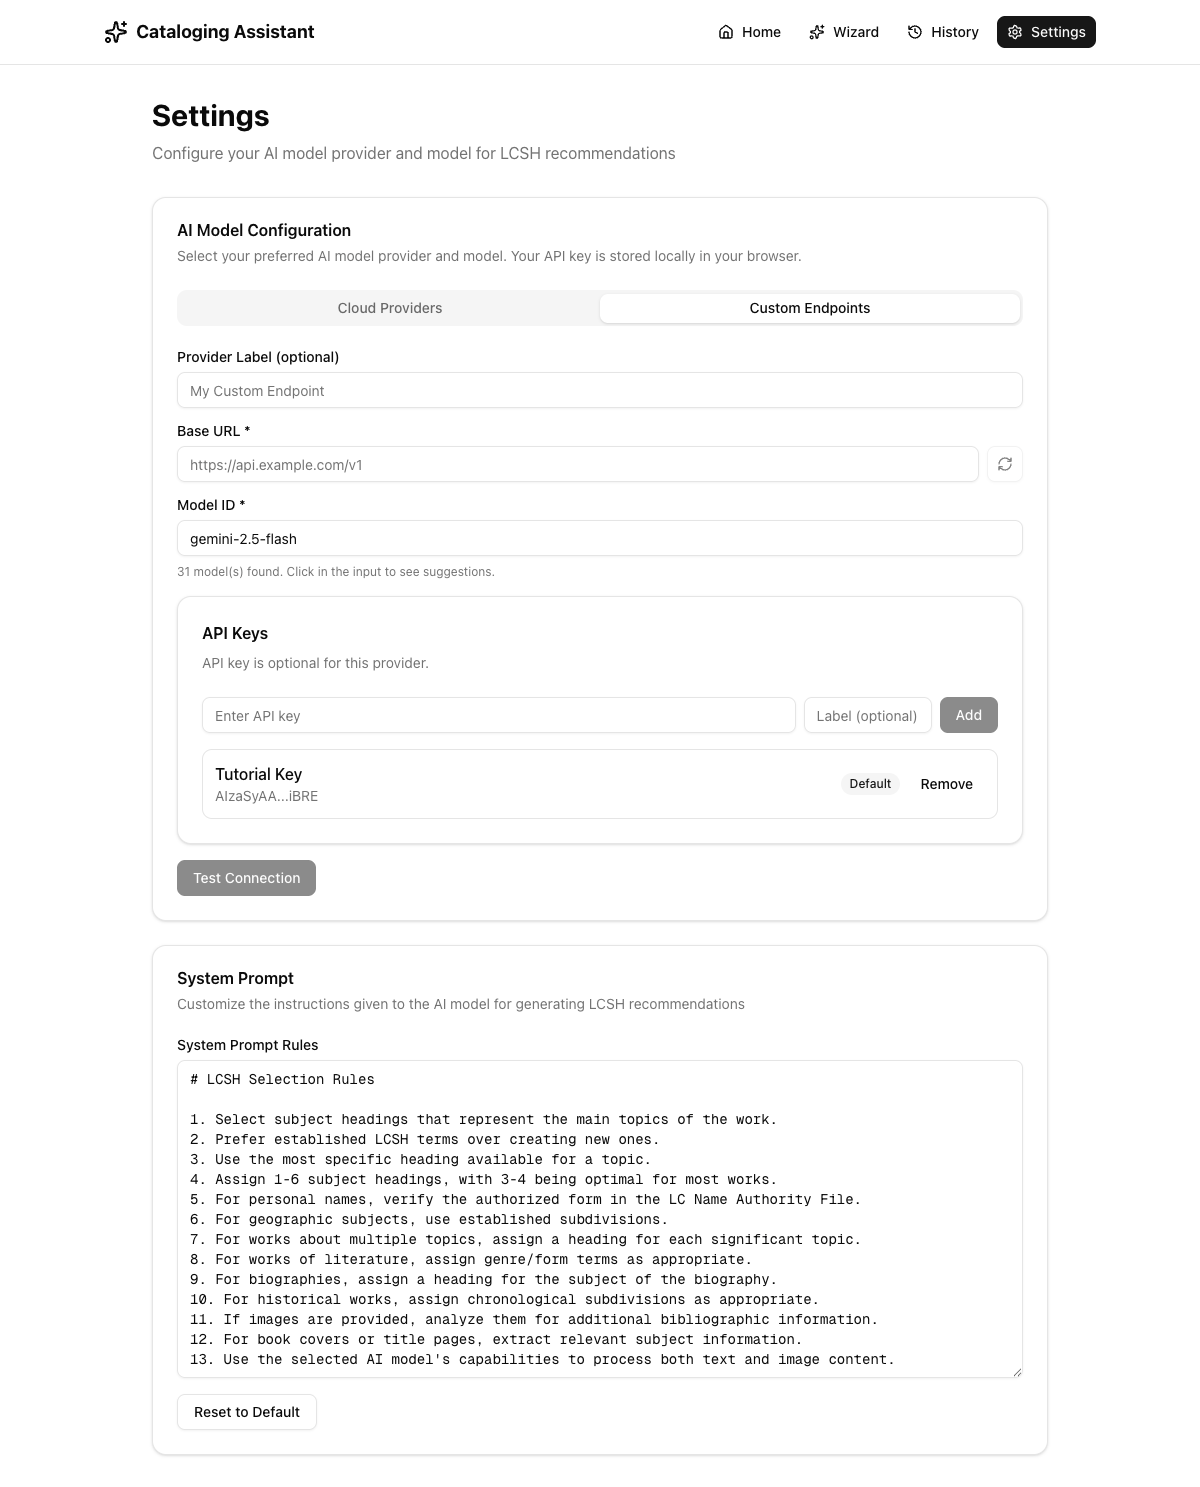
- Provider Label (optional) — give your endpoint a friendly name
- Base URL — enter the full base URL (e.g.,
http://localhost:11434/v1for Ollama) - Fetch Models — click to discover available models
- Model ID — select or type the model
- API Key (optional) — add if your endpoint requires auth
- Test Connection — verify everything works
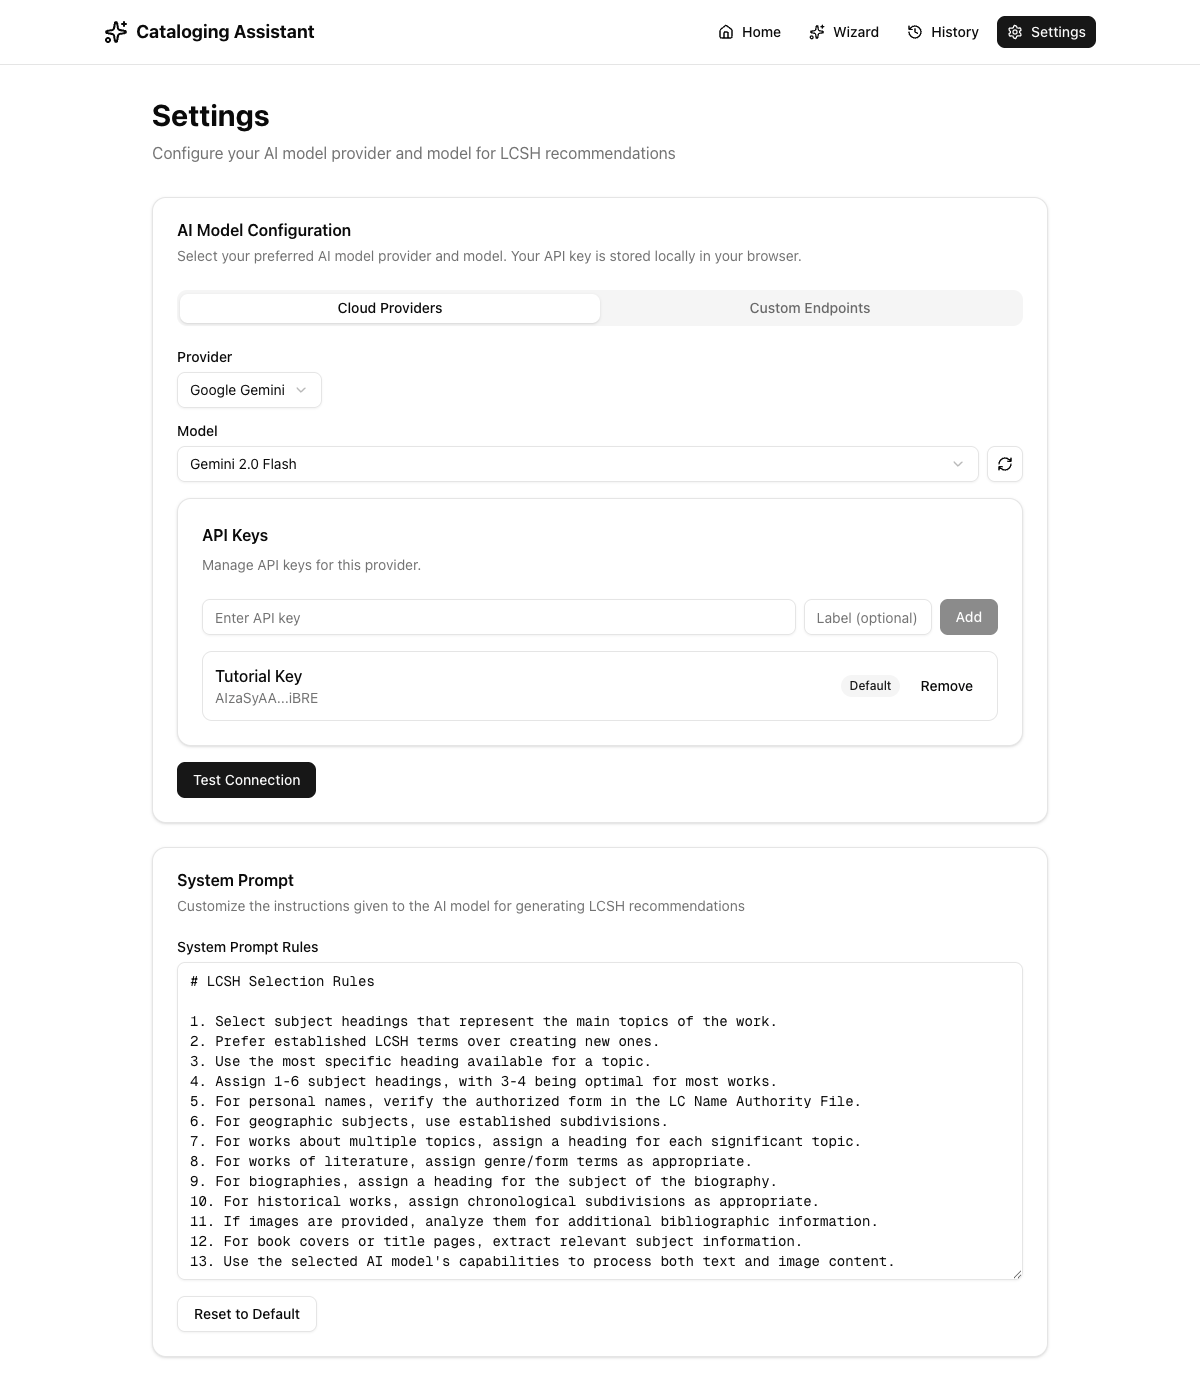
System Prompt Customization
Scroll down on the Settings page to find the System Prompt section:
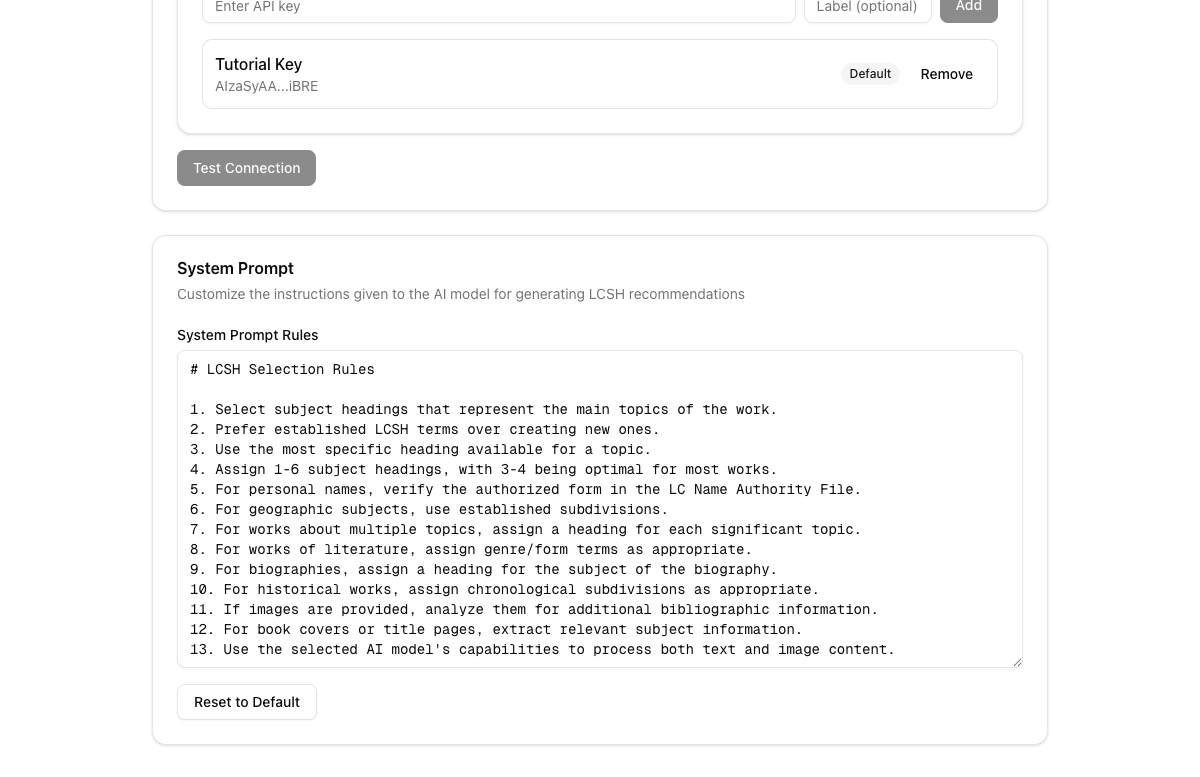
The default system prompt includes 13 LCSH selection rules that guide the AI. Edit the text directly to add institution-specific rules, or click "Reset to Default" to restore.
3. Using the Wizard: Complete Walkthrough
The Wizard is the core feature. Below is a complete walkthrough using "The Great Gatsby" by F. Scott Fitzgerald as our example.
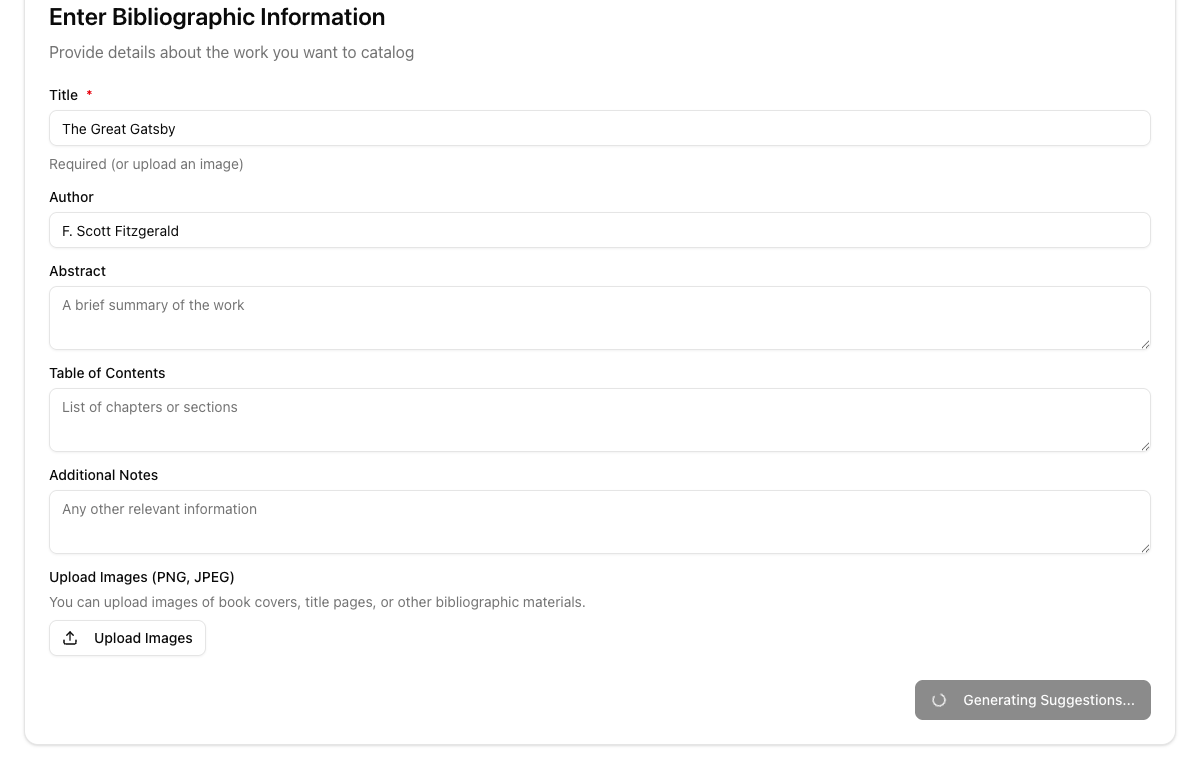
Step 1: Enter Bibliographic Information
Navigate to the Wizard by clicking "Start Wizard" on the home page or "Wizard" in the nav bar.
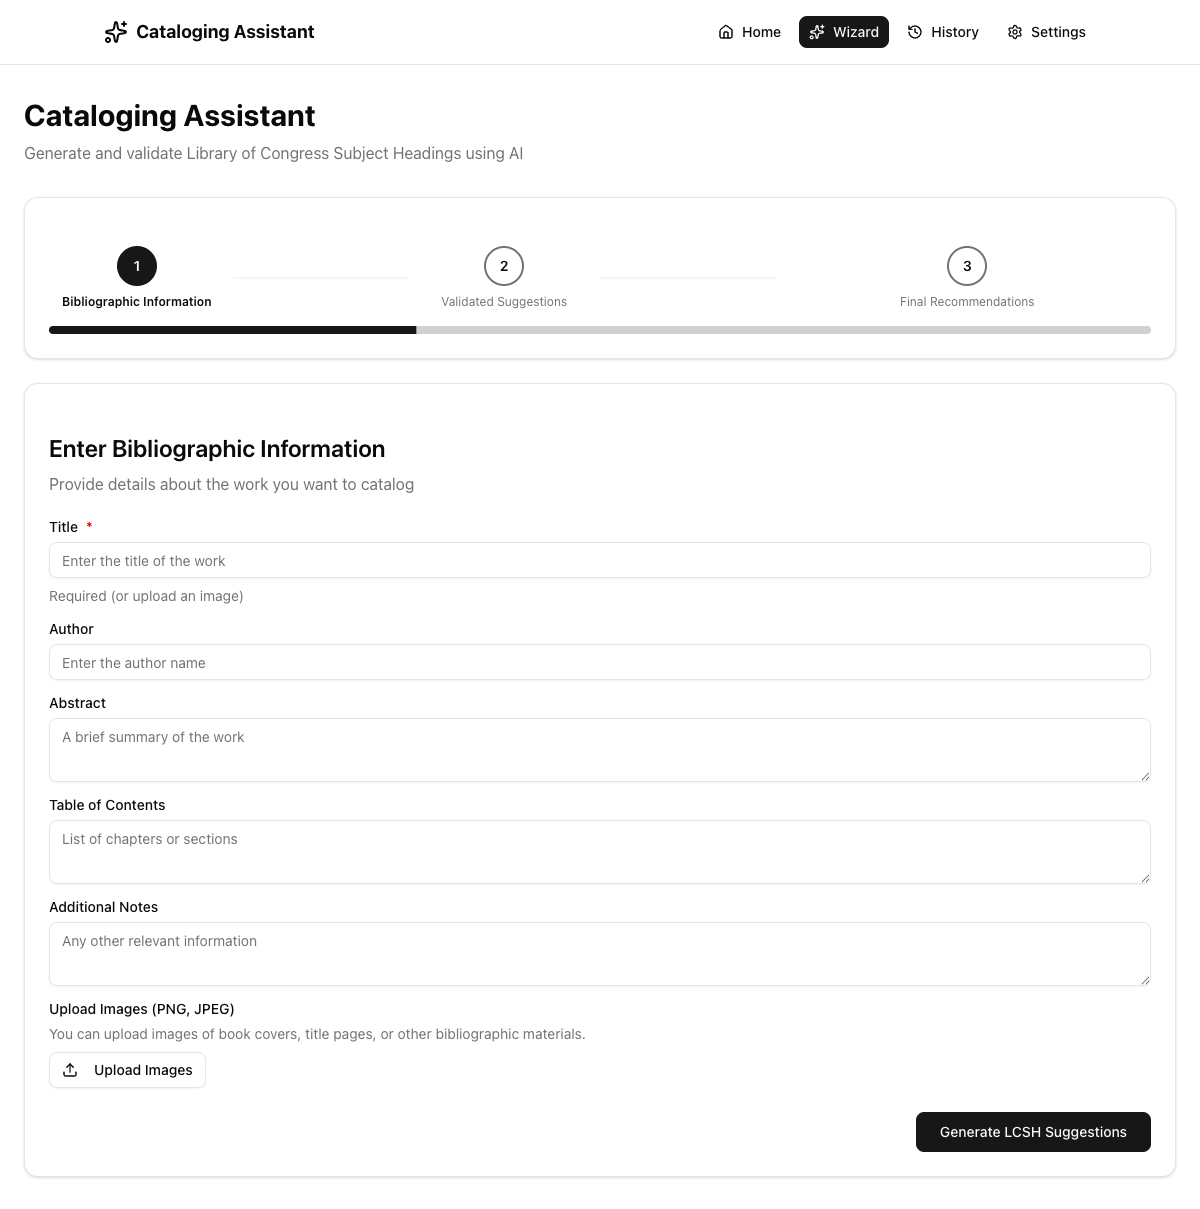
| Field | Required | Description |
|---|---|---|
| Title | Yes* | The title of the work being cataloged |
| Author | No | The author or creator of the work |
| Abstract | No | A brief summary or description |
| Table of Contents | No | Chapter titles or section headings |
| Additional Notes | No | Any other relevant information |
| Upload Images | No | PNG or JPEG images of book covers, title pages |
*Title is required unless you upload an image.
Example: Filling Out the Form
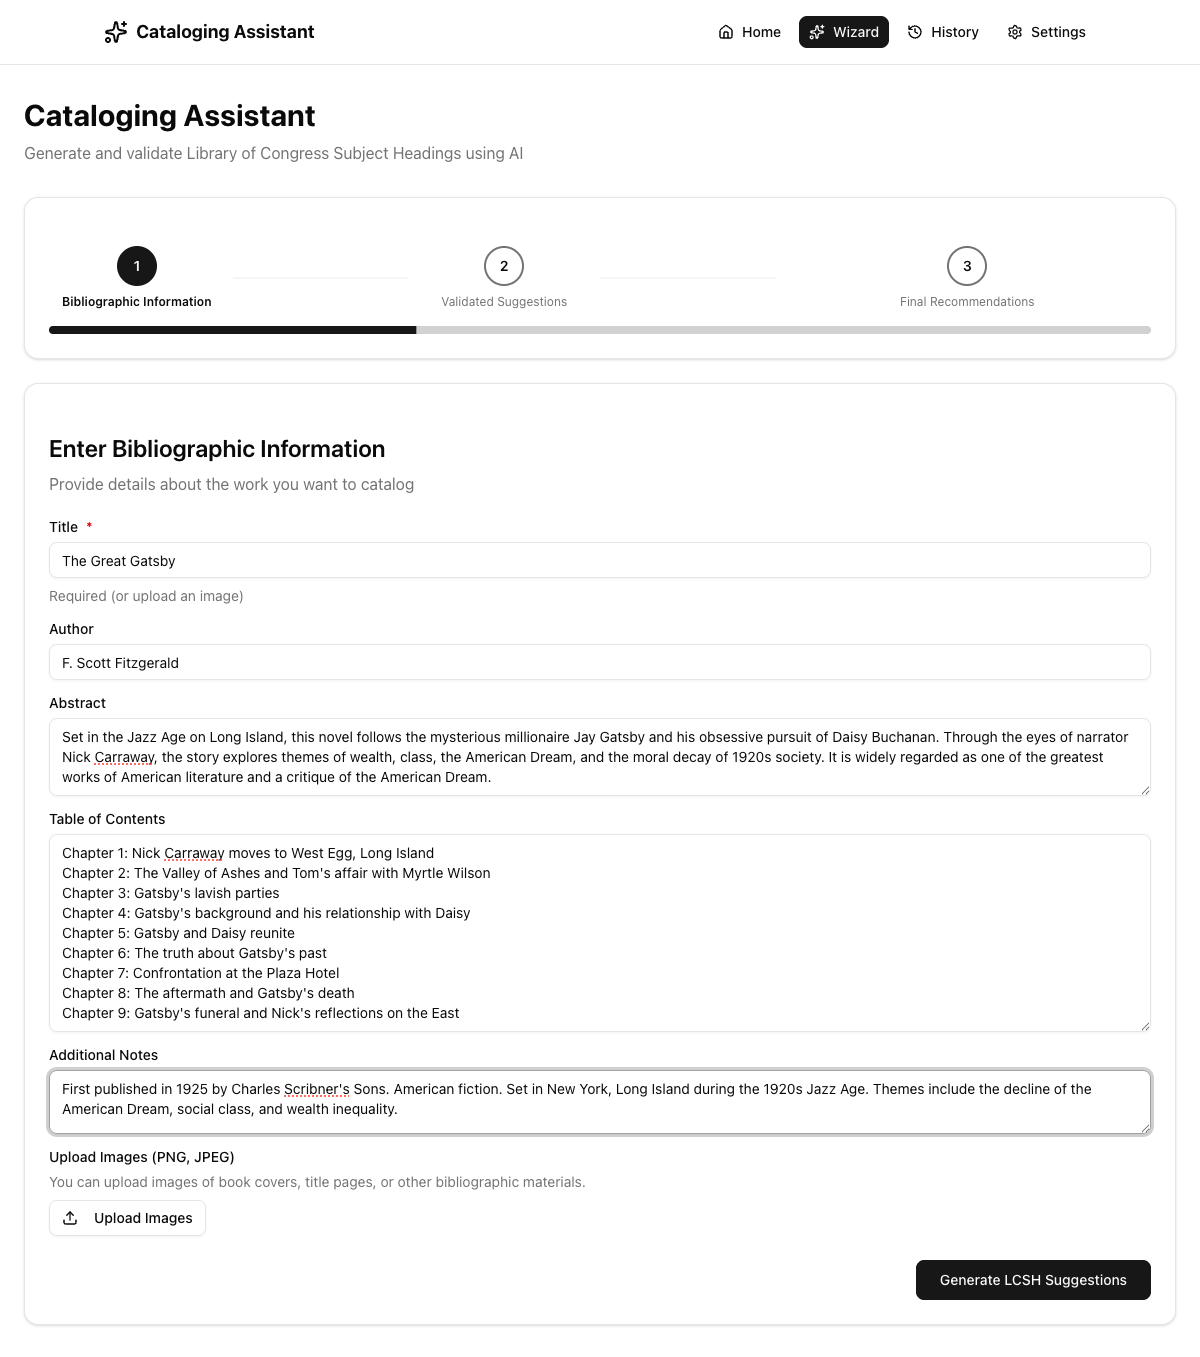
Generating Suggestions
Click "Generate LCSH Suggestions". You'll see a loading spinner:
What happens behind the scenes:
- Your bibliographic data is sent to the configured AI model
- The AI generates subject heading suggestions with reasoning
- Each suggestion is validated against the Library of Congress (LCSH + LCNAF)
- Similarity scores are calculated using Levenshtein distance
- Results automatically advance to Step 2
Processing typically takes 10–30 seconds.
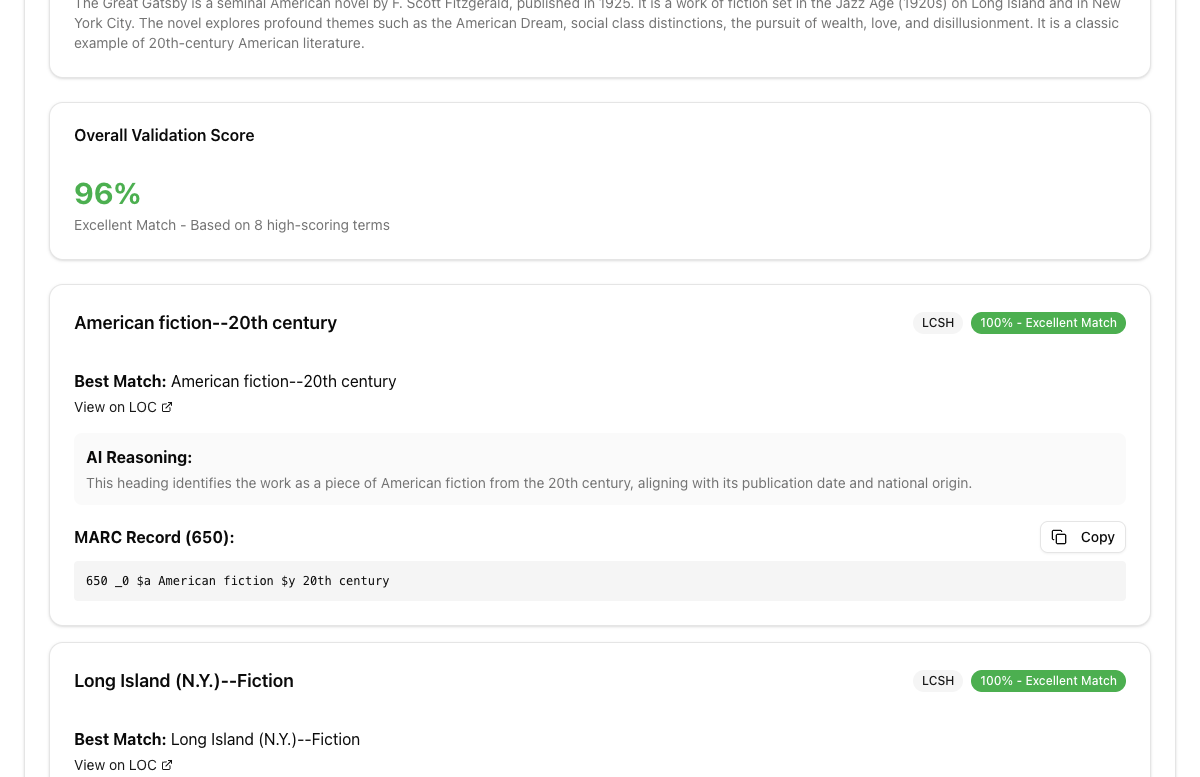
Step 2: Reviewing Validated Suggestions
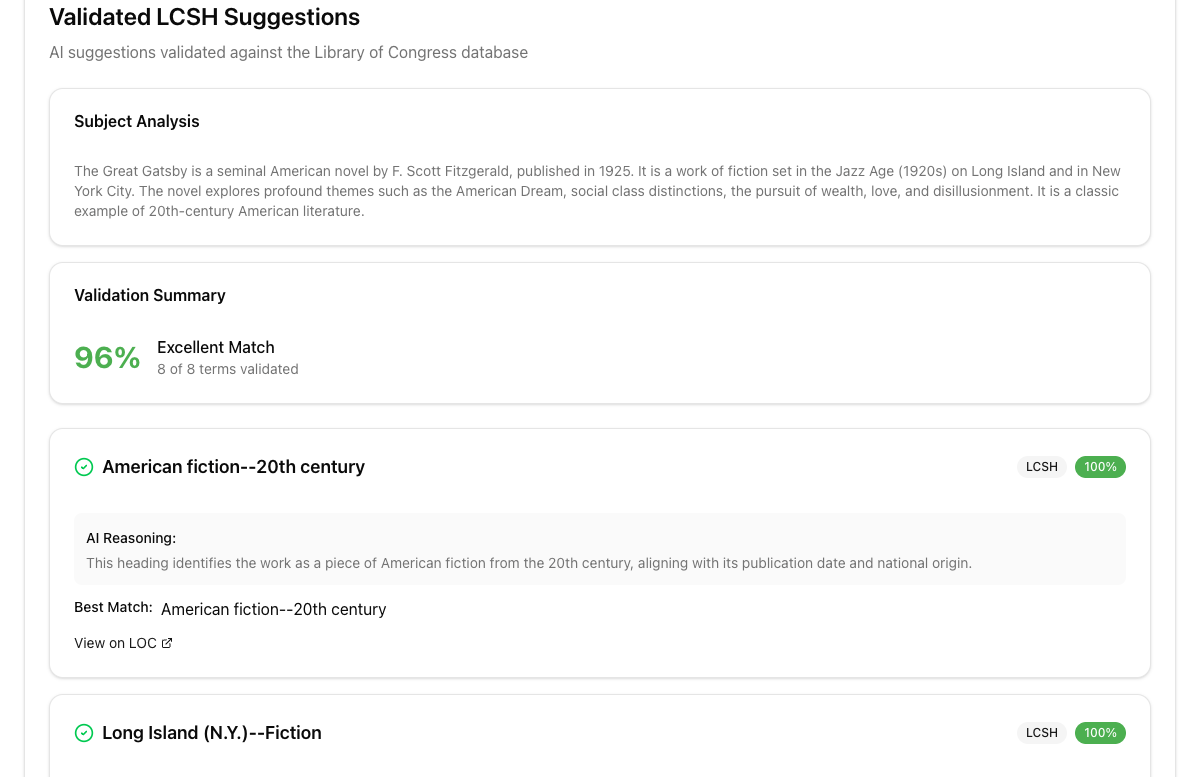
The Subject Analysis shows an AI-generated expert analysis of the work's themes. The Validation Summary shows overall quality.
Understanding Individual Terms
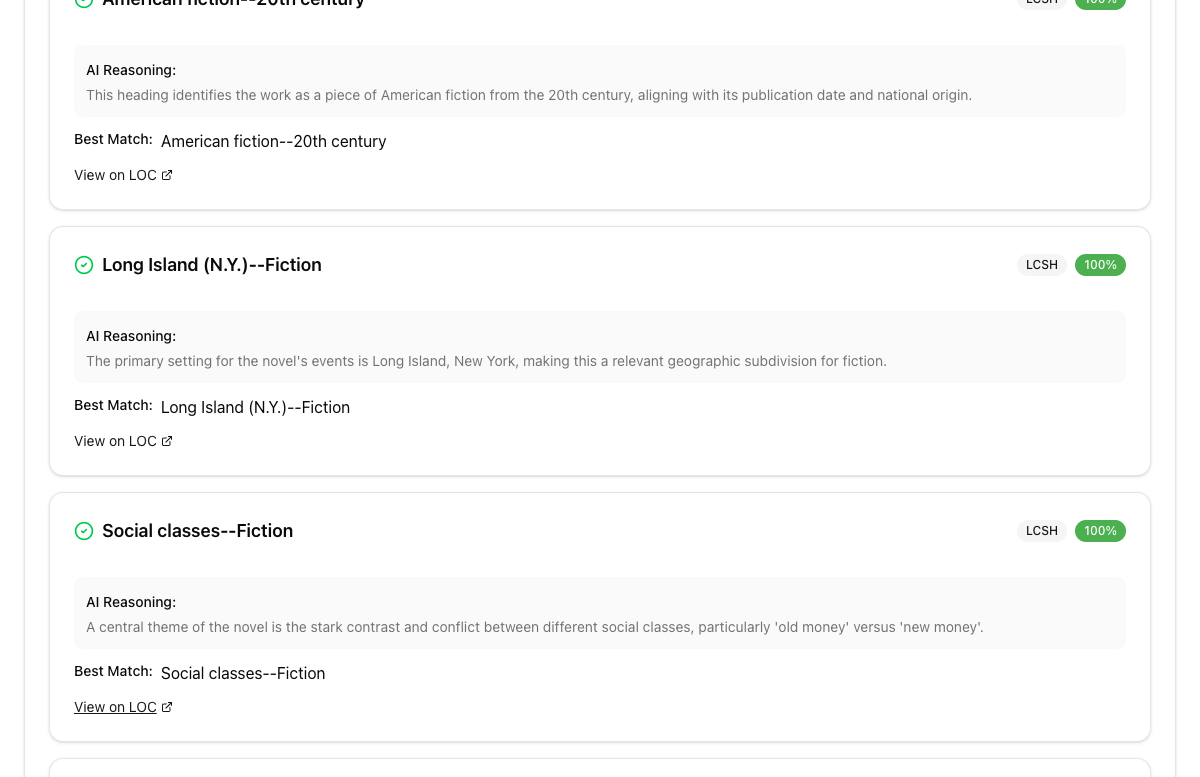
For each term, you'll see:
- Status Icon — green checkmark (exact match) or yellow triangle (closest match)
- Term Name — the suggested LCSH heading
- Source Badge — LCSH or LCNAF
- Similarity Score — color-coded percentage
- AI Reasoning — why the AI chose this heading
- Best Match — the official LOC heading
- View on LOC — direct link to the authority record

Terms with an AI Additional badge were inferred from the work's themes beyond what was explicitly in the input.
Complete Results for "The Great Gatsby"
| Term | Source | Similarity | Best Match |
|---|---|---|---|
| American fiction--20th century | LCSH | 100% | American fiction--20th century |
| Long Island (N.Y.)--Fiction | LCSH | 100% | Long Island (N.Y.)--Fiction |
| Social classes--Fiction | LCSH | 100% | Social classes--Fiction |
| Wealth--Fiction | LCSH | 100% | Wealth--Fiction |
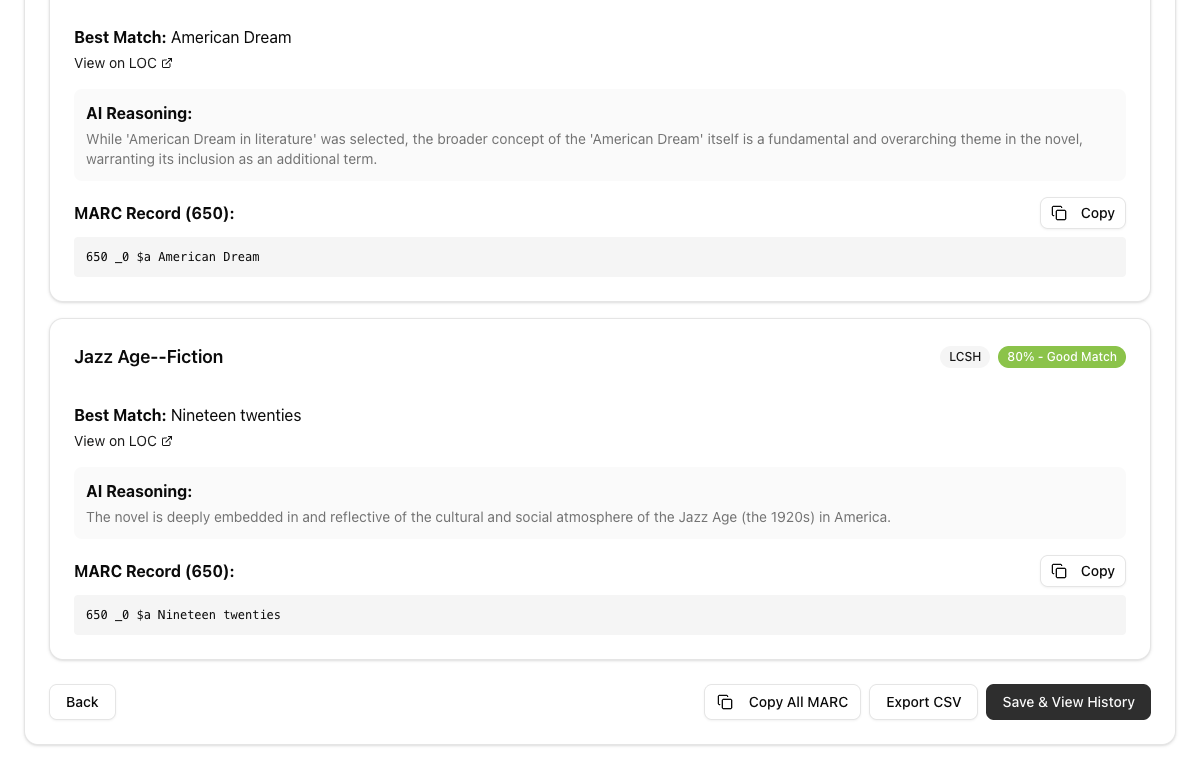
| Jazz Age--Fiction | LCSH | 80% | Nineteen twenties |
| American Dream--Fiction | LCSH | 95% | American Dream in literature |
| Aristocracy (Social class)--Fiction | LCSH | 95% | Aristocracy (Social class)--Fiction |
| American Dream | LCSH | 95% | American Dream |
Step 3: Final Recommendations & MARC Records
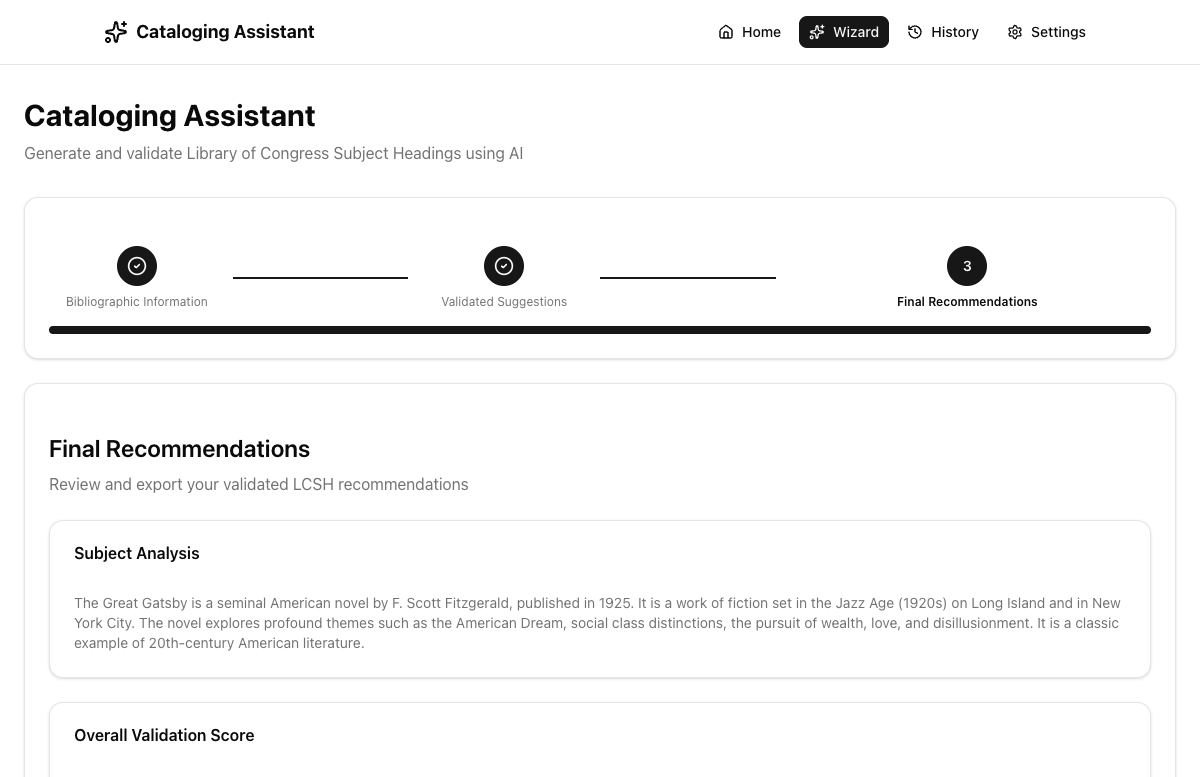
Example MARC Records Generated
650 _0 $a American fiction $y 20th century
650 _0 $a Long Island (N.Y.) $x Fiction
650 _0 $a Social classes $x Fiction
650 _0 $a Wealth $x Fiction
650 _0 $a Nineteen twenties
650 _0 $a American Dream in literature
650 _0 $a Aristocracy (Social class) $x Fiction
650 _0 $a American Dream
Exporting Your Results
| Button | Description |
|---|---|
| Back | Return to Step 2 to review suggestions |
| Copy All MARC | Copy all MARC records to clipboard at once |
| Export CSV | Download a CSV file with all data |
| Save & View History | Save the session and navigate to History |
4. Managing Conversation History
History Table
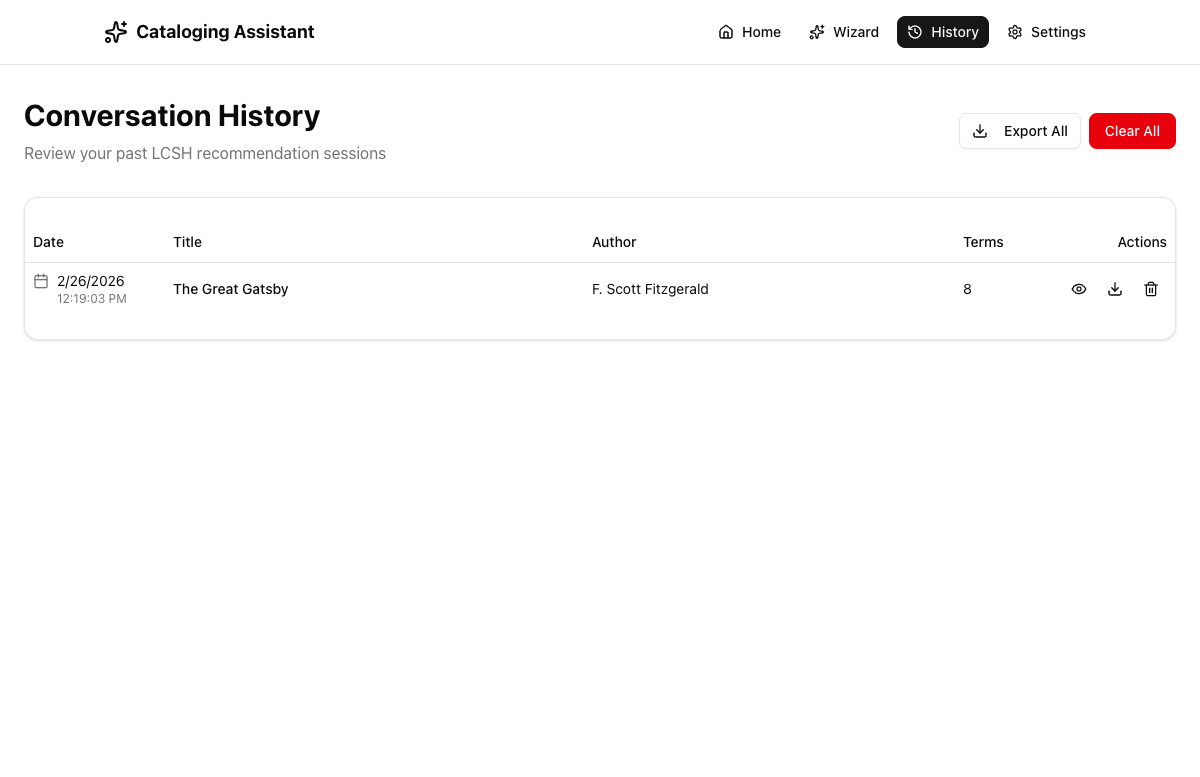
The table shows date, title, author, term count, and action icons (view, export CSV, delete). Bulk actions at the top right: "Export All" and "Clear All".
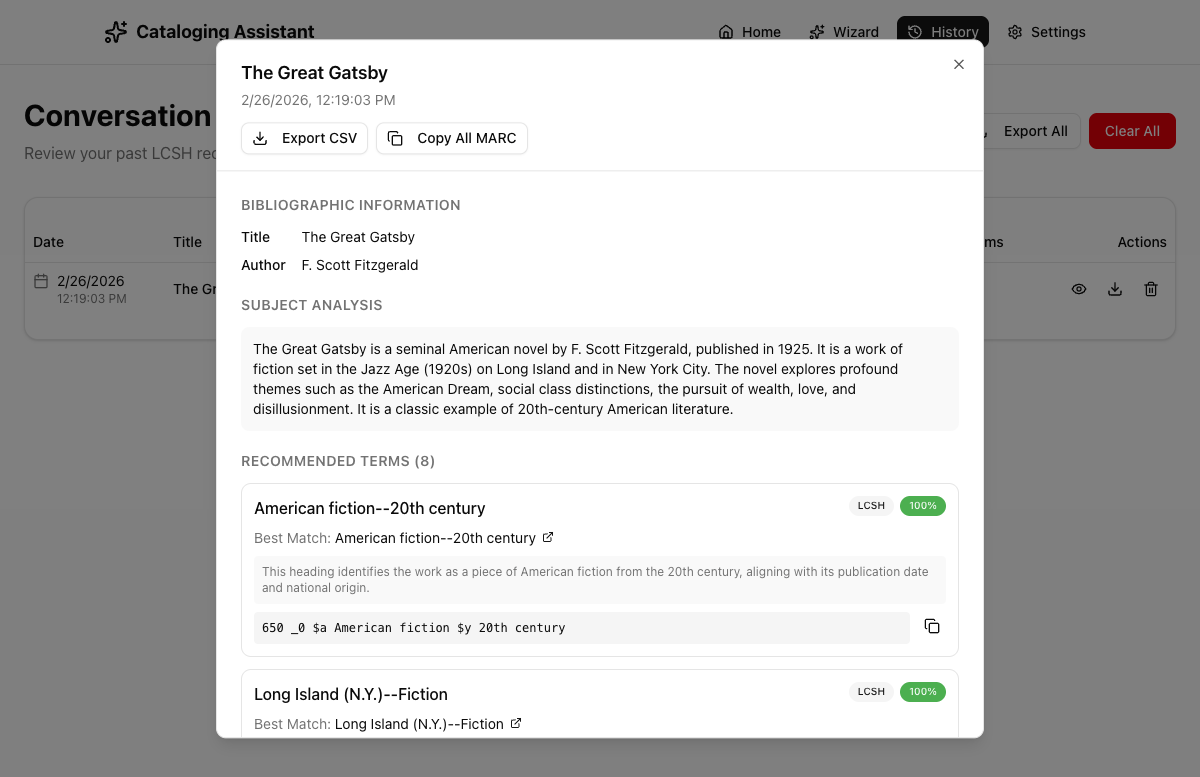
Session Detail View
Click the eye icon on any session to open the detail dialog:
5. Understanding Validation Scores
The app uses Levenshtein distance-based similarity scoring to validate AI suggestions against official LOC headings.
| Score | Color | Label | Meaning |
|---|---|---|---|
| 80–100% | Green | Excellent | Exact or near-exact match |
| 60–79% | Light Green | Good | Very close, minor differences |
| 40–59% | Yellow | Moderate | Partial match, review recommended |
| 20–39% | Orange | Poor | Significant differences |
| 0–19% | Red | No Match | No similar LOC heading found |
Dual Authority Validation
Each term is validated against two Library of Congress databases: LCSH (topical, geographic, genre/form subjects) and LCNAF (personal and corporate names).
6. Working with MARC Records
Understanding the Tags
| MARC Tag | Source | Usage |
|---|---|---|
| 650 | LCSH | Topical subject headings, geographic headings |
| 600 | LCNAF | Personal name subject headings |
| 610 | LCNAF | Corporate name subject headings |
Reading the MARC Format
Example: 650 _0 $a American fiction $y 20th century
650— MARC field tag (topical subject)_0— Indicators (second indicator 0 = LCSH)$a— Main heading subfield$y— Chronological subdivision$x— General subdivision
Using MARC Records in Your Workflow
- Copy to ILS — Use "Copy" or "Copy All MARC" to copy records, then paste into your ILS MARC editor
- Export to CSV — Download CSV files for batch import
- Review and Edit — Always review generated MARC records before adding to official catalog records
7. Tips & Best Practices
For Better AI Suggestions
- Provide detailed abstracts — The abstract is the most impactful field.
- Include table of contents — Chapter headings help the AI understand structure.
- Upload images — Book covers often contain subject info not in text. (Requires vision-capable model.)
- Be specific in notes — Mention audience, geographic focus, time period.
- Use capable models — Larger models (Gemini 2.5 Pro, GPT-4o) produce better results.
For Better Validation
- Check alternatives — When a suggestion has moderate similarity, expand the alternatives.
- Verify LOC links — Click "View on LOC" to see the full authority record.
- Review AI reasoning — The justification explains each heading choice.
- Consider source badges — LCSH (650) for topics; LCNAF (600/610) for names.
For Your Workflow
- Save sessions — Always click "Save & View History" to preserve your work.
- Export regularly — Download CSV files as backups.
- Customize the prompt — Tailor LCSH rules to your institution.
- Test multiple providers — Different AI models produce different results.
- Always verify — AI assists but doesn't replace professional judgment.
8. Troubleshooting
Solution: Go to Settings, select a provider, choose a model, and add an API key.
Solution: Double-check your API key and ensure it matches the selected provider.
Solution: Wait a few minutes, upgrade your API plan, or try a different model.
Solution: Provide more detailed bibliographic information. Try a more capable model.
Solution: Provide more specific input, use a better model, customize the system prompt, or check alternatives.
Solution: Export history to CSV before clearing browser data. There is no cloud backup.